
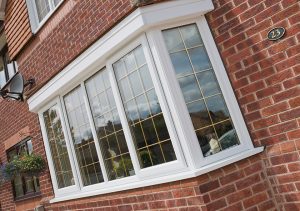
What is FENSA?
Founded in 2002, FENSA is a government-authorised scheme designed to monitor window and door installers’ compliance with building regulations. The FENSA regulations are in place to protect homeowners, and ensure that window and door installers are fully insured, registered with their local council, and compliant with energy efficiency standards. Thankfully, Dave Walters of DW Windows has put together this quick video breaking down the FENSA basics.

Below, we’ll be covering each of the main FENSA documents, including:
How do FENSA regulations affect the window installers?
DW Windows are a FENSA registered company. That means we have the authority to certify that any installation job has been installed to FENSA or building regulation standards.
When we fit the installation, we have to make sure that we use the correct glass, consider fire escapes, and also support the safety and structure of your building.
Once we’ve completed a job, we will register the job with FENSA and they will send you a certificate within 30 days. They also carry out regular assessments on each of their registered installers, to ensure that top-quality practices are still being maintained.
Now, let’s take a look at some of the specifics of the regulations, such as Document A of FENSA.
Approved Document A | Structure

This document requires that we do not supply windows or doors that are load-bearing. In the past, in the 1930s, windows used to be built on top of huge timber frames. This was fine back in the day, but when we come and change them for uPVC windows that are half the size, they obviously can’t take the strain. So, we have to ensure that the structure isn’t going to be affected by us fitting new uPVC windows.
These are frequently asked questions that people have asked me over the years:
1. Do we have to fit lintels to every window and door?
In new build properties: yes. Under the current regulations, a lintel must be fitted to any brand new buildings. A FENSA registered builder or installer should do that.
Replacement windows: no, we don’t have to fit a lintel every time. So, if we’re changing your windows and your windows already have lintels in then we don’t have to charge people for a lintel. This is also the case if there are soldier bricks above the window that haven’t failed in any way. As long as we’re satisfied that the new windows are not receiving any of the load from the building, lintels won’t be necessary.
2. How do we know if a window needs a lintel?
This is what we do, day in day out. Our surveyors are all-time-served surveyors who can spot various tell-tale signs:
- Broken glass in the existing window – If there’s any weight on that window, the first thing that’s going to break is the glass.
- Any cracks above the window – A ‘pyramid’ crack in the brickwork above a window is a dangerous sign. It’s very likely that, as soon as you take that window out, the bricks are going to fall out. That’s the last thing that we want.
We also have local knowledge on our side. We may have worked for your neighbours; we may have worked in the area; we may have seen your type of property before and we can normally tell in advance if it requires a new lintel. We can look at a job and think ‘yes, this is a 1970’s house / 1980’s, it’s got to have a lintel in; it should be ok.’ However, we must consider the possibility that it was meant against regulations by an unscrupulous builder. For that reason, we only charge people for lintels whenever we are sure that it needs one. Sometimes, customers do get caught out. We start taking the window out, the brickwork starts to move, and then we do have to have a conversation with the customer to agree a price for fitting the lintel. The last thing we want to do is fit lintels, but sometimes it is necessary in order for new windows to be installed safely and to FENSA standards.
3. Who has to pay for the lintel?
As it’s the customer’s property, the customer needs to pay for the lintel. There are companies out there who will say they’ll ‘turn a blind eye and we’ll put some packers up there and a bit of silicon and it’ll be alright.’ We’re not that way inclined. We’d rather do it properly.
4. What about load-bearing bay windows?
Load-bearing bay windows are normally in the old sort of traditional 1930s houses. For bay windows with brickwork or tiles above, there’s a lot of weight of the windows to carry. In some cases, they even take the weight of the roof of the main building above. In this event, there are various other things we can do. We can strengthen the frames, and we always use reinforced bay poles. These are aluminium or steel reinforcements in the joint of each window. They transfer some of that weight from the brickwork above down through the sill into the ground. If it’s worst-case scenario we do jacking plates, which are small acro props that go inside the actual bay pole which can be wound up to lift the head a bay window and take any weight off the new window that we’re fitting below.
Approved Document C | Resistance to moisture
This is about ensuring that the windows and doors protect the building from:

- ground moisture
- precipitation (or rain)
- surface condensation
- spillages or leaks
So, what we do to prevent the weather from getting into your property is obviously the windows are weatherproof and draught-proof; that all goes without saying. There are a few other things that we have to do on the installation side of things, to ensure there’s no draughts or water that can get inside your property in any way.
Vertical damp course membranes
We also have to do things like checking vertical damp course membranes. Some older 60’s and 70’s properties have got a damp proof membrane, running up and down the side of the frame in the cavity to stop any draughts from getting in there. We have to check the membrane underneath the seal, to make sure that’s not penetrated in any way, so no water can get in around the side of the sill and then down to the cavity.
Sealing the window
We also obviously seal the window. Once the window is fitted in, we run a line of silicone externally. We then hide that silicone because it could shrink, crack and attract the dust. We put a uPVC trim over the silicon which gives it an extra seal, makes it more energy-efficient and, most of all, it makes the job look good for years and years to come. Nice and clean, so there’s virtually hardly any silicone left visible once we’ve fitted the job the way we do it.
Approved Document F | Ventilation
This concerns the opening of windows and trickle ventilation, or ‘background ventilation’. A lot of the questions we normally get asked by customers are:
‘Do I have to have trickle vents?’
And the answer is if it’s a new build or extension, then yes you do – that’s building regulation for all new properties.
If it’s for a replacement window, then it depends on what the old window had. So, if the old windows had trickle vents then we have got to replace the new window with trickle vents. It’s a bit of a grey area, but the rule is as long as we’re not making the situation any worse.
‘What is a trickle vent?’
A trickle vent is a hooded vent placed usually at the top of your window frame. The outside has got a grill to stop insects from getting in and the inside has got a flap on it, so it can be opened and closed. The size of your tickle vent is all depending on the size of the window and the room that we’re putting them in.
‘Is there any alternative to a trickle vent?’
Yes, there is and it’s quite costly. Mechanical ventilation or, in other words, extractor fans in every habitable room. Or you can have the old-fashioned air-bricks put back in; which again, are very unsightly. A lot of people don’t like the look of trickle vents, but unfortunately, that’s the regulations. We have to work with them and abide by them. A lot of the new builds now are having mechanical or electrical ventilation fitted as standard.
‘Why do you have to have trickle vents?’
Another question we get asked quite a lot! It’s to allow the room to breathe, they get rid of fumes from fires and appliances and also any other moisture in the air. It also helps to reduce condensation. I’m not a massive fan of them because our windows now are A+ energy rated, they’re triple-sealed and airtight, we use the latest glass and then we have to drill a hole in the frame and put a ventilator on to allow that warm air to escape. On the flip side in that warm air, you get a lot of vapour and condensation and without background trickle vents you can get a build-up of condensation in certain rooms. Houses nowadays that thermally efficient and sealed, some properties do need background ventilation to stop that building from sweating too much.
‘When are trickle vents required?’
Trickle vents are required on windows and doors in the following areas:
- Windows and doors in newly built homes
- Windows and doors in newly built extensions
- Replacement windows and doors that currently have them
These building regulations are subject to change and are likely to be constantly updated.
Background ventilation is necessary to give occupants in any home a healthy indoor environment. The primary purpose of trickle vents is to replace tainted indoor air with fresh outdoor air. Trickle ventilation is a vital component of a healthy living environment and prevents the build-up of a damp, warm atmosphere, which can lead to health concerns.
‘Where do trickle vents get fitted?’
The trickle vents get fitted as high as possible on the windows, supposed to be at least 1.7 metres above the floor level but when we’re replacing windows, we have to work with what we’ve got. So, as high as possible on the window.
A couple of things to watch out for in terms of ventilation
If we’re replacing your windows, and we’re taking a window out which has got an opener on the top but you want to put an opener on the bottom to give you an adequate fire escape, we’ve got to mix and match two lots of regulations. That would not pass the current regulations because of having to remove the top ventilation from that window you achieve the fire escape, but you’ve got no high-level ventilation. So, another way of getting around that, you can retain the little top opener but put a big opener at the bottom as well to give you your fire escape. Or you could put a trickle vent in the top of the window in the frame. Another solution would be to have a full side opening or a top push-out opener because once that window is open, air, warm air and vapour can escape from the top of that window. The reason it has to be high up is that warm air rises; warm, moist air will rise and escape through that open window.
Continuing on with ventilation, there are two main types. We’ve discussed the first one, the background ventilation which is the trickle vents. The other method is purge ventilation, which is opening windows.
Purge ventilation – Opening Windows
Opening windows need to be 1/20th of the floor area of a room. So, for example, a room that’s 10 metres by 10 metres (100m2, that’s a massive room by the way), 100m2 would require a clear opening of 5m; 5 is 1/20th of 100m2. A lot of rooms are 3m by 3m, so you end up needing an opener of about 600; a standard fire escape opener will achieve your fire escape and your ventilation in most standard domestic rooms.
Another couple of things;
‘Do you need a ventilator, a trickle vent or an opening window on every single window in a room?’

The answer is no, as long as you achieve your fire ventilation 1/20th of that room area. So, you may have a door in that room, so that would potentially be adequate because you can class doors as openers as well.
Approved Document J | Combustible Appliances and Fuel Storage Systems
The main thing we have to bear in mind, as a window company fitting or replacing existing windows, is that the new windows can’t make the situation any worse. So, what that basically means is we can’t put a new opening window any closer to a flue. Or we can’t make the ventilation in a room any worse than it was before we turned up to fit the windows or doors.
Just a brief look at the three main types of appliances;
- The flueless type
This would be some types of fires, gas cookers and that type of appliance. They may need a permanent vent i.e. a permanent fixed open-air vent, like an air brick for example. - The open flue type
They need air circulation throughout the room because that air circulation in the room allows the appliance to operate at its optimum and at its safest. - Room sealed (Balanced Flue System)
This is the more modern type of flue and by far the safest type of flue. The way this works is there’s a flue on a back of a boiler, as a pipe within a pipe. The outer pipe sucks air in from the outside and the inner pipe acts as the exhaust pipe that blows out the hot fumes.
There are minimum distances from a flue that an opening window has to be. On a balanced flue (or the ‘Room Sealed Flue’) if the flue is below a window, the minimum distance that flue can be from the open window is 300mm, on an appliance, it’s up to 7KW. 7-14KW; that distance has to be extended because it’s a more powerful appliance to 600mm.
14-32KW; 1.5m, which is 5ft in old terms, and 32KW and above, that’s more of an industrial size appliance and the flue has to a minimum of 2m – that’s quite a distance from that open window.
Distances are reduced if the flue is above the window;
300mm on an appliance up to 32KW and over 32KW its 600mm or 2ft.
If the flue is to the side of the window, up to 7KW it has to be 1ft (300mm), 7-14KW has to be 400mm and if it’s above a 14KW appliance the distance has to be 600mm.
On the open flue type, because they’re less powerful and fewer fumes being forced out, the minimum distance is 300mm on all power types. But if you’re in any doubt, as a window company we’re not experts in combustion and appliances and we’re not Gas Safe or CORGI registered, so please refer to a Gas Safe or CORGI registered person.
Just to simplify that, and show you in picture form… (please refer to the video above from 04.40 minutes in)
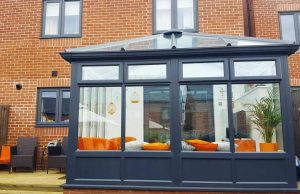
Conservatories and Extending Flues
Another area that we have to deal with is conservatories, when we try and put a conservatory on someone’s house 9 times out of 10 it’s on a back of a house where the boiler is. So, what I’ve done here is draw a diagram to show you how much we can extend a flue… (please refer to the video above from 05.23 minutes in)
It’s not always as simple as you can extend it as far as you like because you can’t. It’s always worth investigating whether it’s possible to extend your boiler’s flue before you sign up to a conservatory. We can look into all that for you and if we’re in doubt we’ll get a plumber round who can assess your boiler. It basically depends on your boiler, some boilers you can have an extended flue of just 1m, some boilers are up to 3 or 4m. But the thing to bear in mind, every length of pipe is a minimum of 1m. Every bend is classed as 1m. So, on this situation here (06.12 mins in) where we just want to extend that flue 1.5m maximum, it’s actually classed as 5m of flue pipe there because you’ve got 3 separate lengths of pipe at 1m each and two bends. So, add that up together and that obviously adds up to 5m of pipe. So, you’d need a pretty good boiler to be able to do that. Normally, if a boiler is in the way of a conservatory 9 times out of 10, we can’t extend it; it has to be moved, which obviously incurs a cost. We just want to keep you fully informed about hidden costs before you make your mind up and that might be an influencing factor on whether you can, or you can’t, have a conservatory.
Approved Document K | Protection from falling, collision and impact
Document K is split into two sections, K2 and K4. Firstly, K2 is about protection from falling from and collision with windows and doors. Falling relates to falls of 600mm or more and to opening windows lower than 800mm from the finished floor level (FFL). So, if you’ve got a window opening lower or within 800mm of the floor and there’s a danger that you could fall out of that, and the fall to the floor on the outside is more than 600mm (or 2 feet), then we need to do something to make that situation safer.
Collision mainly relates to colliding with an open window. So, if a window opens too far and it’s within 800mm of the floor level then there’s a potential for a passer-by to walk into that open window and get injured. Best advice is to fit a restrictor to open windows below 800mm from the finished floor level and we would do that as standard. But there’s a bit of a grey area with this and as long as we’re not making the situation any worse (and this only applies to K2, not K4), we can replace like for like. So, what that means is if the old window hasn’t got a restrictor on then we wouldn’t have to put a restrictor on the new window. Or on the other hand, if we’re changing the design of the window and adding an opener at the bottom, or the old window has got a restrictor on, then it’s best practice to put a restrictor on the new window.
What is Approved Document K4?
K4 is the main one about protection against impact with the glass itself, with the glazing. Any glass within 800mm of the finished floor level (FFL) or within 300mm of a door has to be safety glass. So, that does include high-level glass, top lights and that mainly above 1500mm – I’ll explain that a little more in the diagrams I’ve got at the bottom.
What is safety glass?
It can either be toughened glass, laminated glass or wired glass. What the toughened glass is designed to do is shatter into tiny little pieces if someone did manage to collide with it and break it, rather than get cut to shreds with shards of glass. Wire glass and laminated glass is a lot tougher to break, but if it does it locks together and it doesn’t break into shards – so that’s where you get the safety from, from those two options.
Critical locations
As I mentioned earlier, the 800mm dimension and the 300mm dimension I’ve put on this diagram here. So, basically, any glass within 800mm (which is all this low-level glass) has to be toughened. Any glass within 300mm of the door has to be toughened, but that doesn’t apply to any glass above the door i.e. that top light there – although, within 300mm of the door, it’s above 1500mm so it doesn’t apply to that. And this pane here, the whole of that pane has to be toughened safety glass because part of it is within 300mm of the door. So, you can’t actually toughen part of the glass unit, you have to toughen the whole of the glass unit.
A couple of other areas where people get confused are stairs – the dimension is the same, 800mm, but it’s measured directly down. So, if that side of the window is a metre from that step (but this dimension here is a lot less than that because the stairs are rising), then if any part of that glass is within 800mm of the surface of a step at a right angle downwards then the whole of that glass unit would have to be toughened or safety glass.
Safety glass in bathrooms?
Now the other area is in bathrooms. You don’t always have to have safety glass in bathrooms, the same rule applies; the 800mm from the finished floor level (FFL) and (in this case) the finished floor level would be classed as the actual bottom of the bath where you would stand. So, on here the 800mm from the bottom of the bath is coming half way through that glass unit there – so the whole of that bottom glass unit would have to be safety glass. The top one wouldn’t as it’s above 1500mm and it’s also out of the 800mm danger area. And that wouldn’t be there because all of its above 800mm, so none of that glass would have to be safety glass.
Approved Document L | Conservation of fuel and power
Document L is the conservation of fuel and power, it’s compulsory and there’s no grey area. Some of the building regulations are grey, but this is not one of them. All replacement windows should have a window energy rating (WER) of C rated, known as C rated energy efficient, or a U value of 1.6 or below.
What’s a U value?
A U value is a measure of thermal transmittance according to the building regulations. So, in our case, it’s the amount of heat you could lose through a pane of glass. The lower the number, the better it is, so less energy or heat is being lost, so you’re getting better energy efficiency.
 So if you’re loosing up to 1.6 kilowatts per square metre, that’s C rated. The ratings go from A rated, which is the best, up to G rated, which is old fashioned single glazing. To be legal, it has to be fitted as C rated or better.
It applies to all windows, and some doors. It applies to doors when the glass area of the door is greater than 50%. Side panels and top lights that are next to doors need to be registered as separate windows. So, if it’s less than 50% or it’s a solid door, then that particular item doesn’t need to be registered with FENSA.
How do DW windows achieve an A+ energy rating?
Well, we install A+ rated as standard, which is much better than the C rating that’s expected as standard from building regulations. So by the combination of the frame, we use 6 chambers or 6 layers of uPVC. It’s like when you go out in the cold, the more layers the better and the warmer you’ll feel. So our systems with multiple chambers or 6 layers of uPVC, reduce the heat escaping with each layer or chamber. With the chambers, you’ve got two to the outside and two chambers to the inside, the outer will have colder air and the inside will have warmer air and the two chambers in the middle,  that’s where the magic happens, heat shouldn’t transmit through those two central chambers.
We use 28mm double glazed units. So it’s got 2 4mm pieces of glass, and in between that you’ve got a 20mm gap. We fill that gap with argon gas, which is an invisible insulating gas that stops heat escaping through the glass itself.
We use a soft thermal coating to the inner pane of glass. This traps the heat inside your home and lets heat and light transfer in, but doesn’t let it escape again. The coating is invisible, the newer soft coating we use is a lot less visible than the old-fashioned hard coating. The problem here is that you can see the mist and that coating.
We also use the warm edge spacer bar. That’s the bar that creates the gap in between the glass and creates the space between the glass. C rated uses an aluminium bar, we use a thermally efficient spacer bar to stop heat from escaping around the edge of the glass mainly. If you look on windows, that’s where you normally get condensation. That’s because the aluminium around the edge is a conductor, and heat and cold can be transferred a lot through that.
Can you explain the diagram of the double glazed unit?
So looking at the double glazed unit from the front on, you’ve got your 4mm pieces of  glass with the invisible argon glass in between. And then the warm edge spacer bar, and what we do is we use a sealant to seal the glass around the edge. We triple seal the glass units. The way that this all works, light and heat will pass through the glass, through the coating, and into your property to warm it up.
From inside your property, heat will hit the thermal coating and gets reflected back into your home, so you’re not losing as much heat as you would through standard glazing.
So, thanks for reading and if you do want to speak to anyone and get any advice its DW Windows. You can check us out on Facebook and on the internet www.dwwindows.co.uk or if you want a free quote give us a call on 0800 999 0909. Thank you.
Read What We Know About Home Improvements:
How to measure for replacement windows
Are Building Regs Changing, and Does it Affect Home Improvements in the West Midlands?
5 Ways to Make Your Home More Energy Efficient in 2022

- Window Buying Guide: What to Look For - April 1, 2025
- The Ultimate Guide to Double Glazing Costs: How Much Should You Expect to Pay? - May 15, 2023
- 4 reasons you should invest in bi-fold doors for a West Midlands home - March 7, 2023
Back to Top